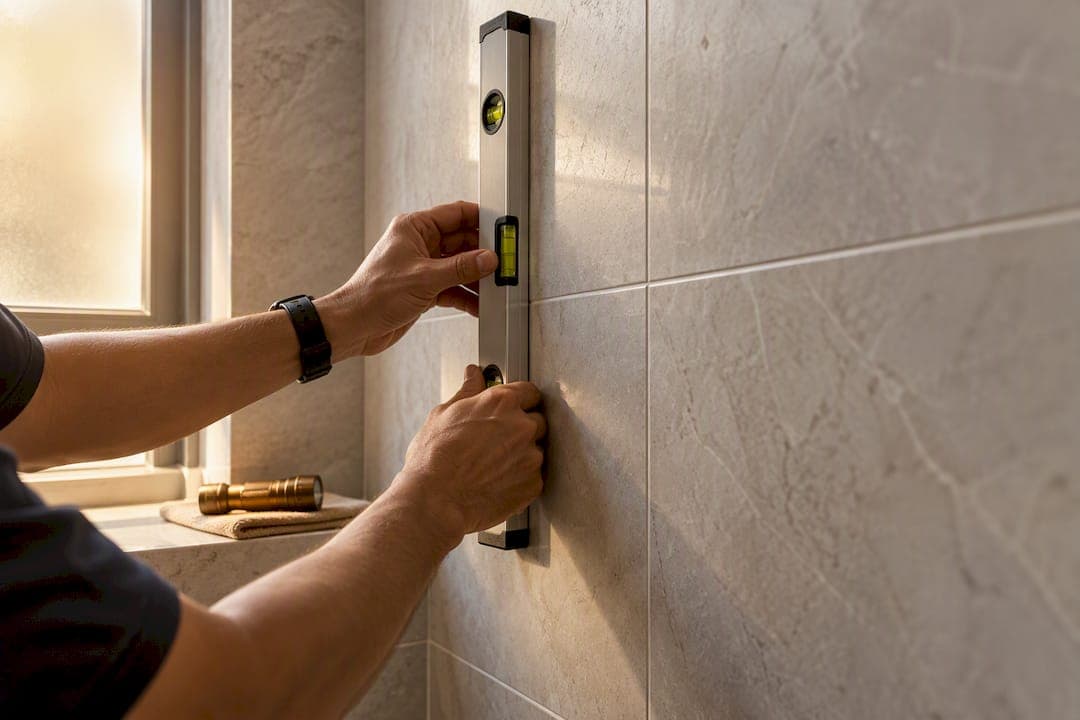
If you have under three hours and the developer's Defects Liability Period applies, work through a room-by-room checklist yourself before signing acceptance. If you want court-ready evidence, multi-trip support, or suspect waterproofing and structural issues, hire a professional such as Absolute Inspection, Uncle Defect, or Prime Defectors. Either way, document everything within your 12-month DLP window before touching a renovation.
TL;DR:
- Engaging a professional is recommended if you suspect waterproofing, structural issues, or need court-ready evidence, especially for hidden defects like seepage or hollow tiling.
- Most inspection firms offer packages ranging from basic single-trip checks to multi-visit diagnostic assessments, costing from hundreds to over a thousand dollars depending on unit size and tools used.
- Always request a detailed, photo-backed report in a developer-ready format before committing, and conduct a thorough room-by-room walk with consistent testing methods.
- Document every defect with timestamped photos, mark their locations, and follow proper escalation procedures if repairs stall or disputes arise during the 12-month Defects Liability Period.
- Important defects to flag as urgent include active leaks, exposed wiring, faulty sockets, and large cracks, while cosmetic issues can typically wait for less immediate attention.
Table of Contents
- Comparing Singapore's Top Condo Defects Inspection Providers
- What Should You Ask Before Booking an Inspection?
- Room-by-Room Checklist for Your Handover Walk
- What to Bring and How to Sequence a DIY Inspection
- How Do You File Defects Within the DLP?
- What Does an Inspection Typically Cost and When Should You Book?
- What Happens After You Report a Defect?
- What Does the Developer's Warranty Actually Cover?
- Do Unresolved Defects Affect Resale Value or Insurance?
- Which Defects Should You Flag as Urgent?
- An Editor's Note on Documentation
- Buyer Resources From Hougang Central Residences
- Sources
- FAQ
Comparing Singapore's Top Condo Defects Inspection Providers
Choosing a provider comes down to matching the scope of the job to what you actually need at handover. A basic joint walk with the developer calls for a different service than a deep waterproofing check before you rip out tiles for renovation.
Absolute Inspection leans technical. It markets itself as RICS-certified, and its inspectors use moisture meters and thermal imaging to catch seepage and hollow tiling that a visual walk misses. That makes it the stronger pick if you suspect a structural or waterproofing issue, or if you think you'll need to escalate a claim later and want a report with institutional weight behind it.
Uncle Defect SG built its business on volume. It has handled a large number of BTO and condo handovers in Singapore, and it structures its service as tiered packages rather than a single flat inspection. That flexibility suits buyers who want someone on-site to help fill out the developer's defect form, not just hand over a PDF.
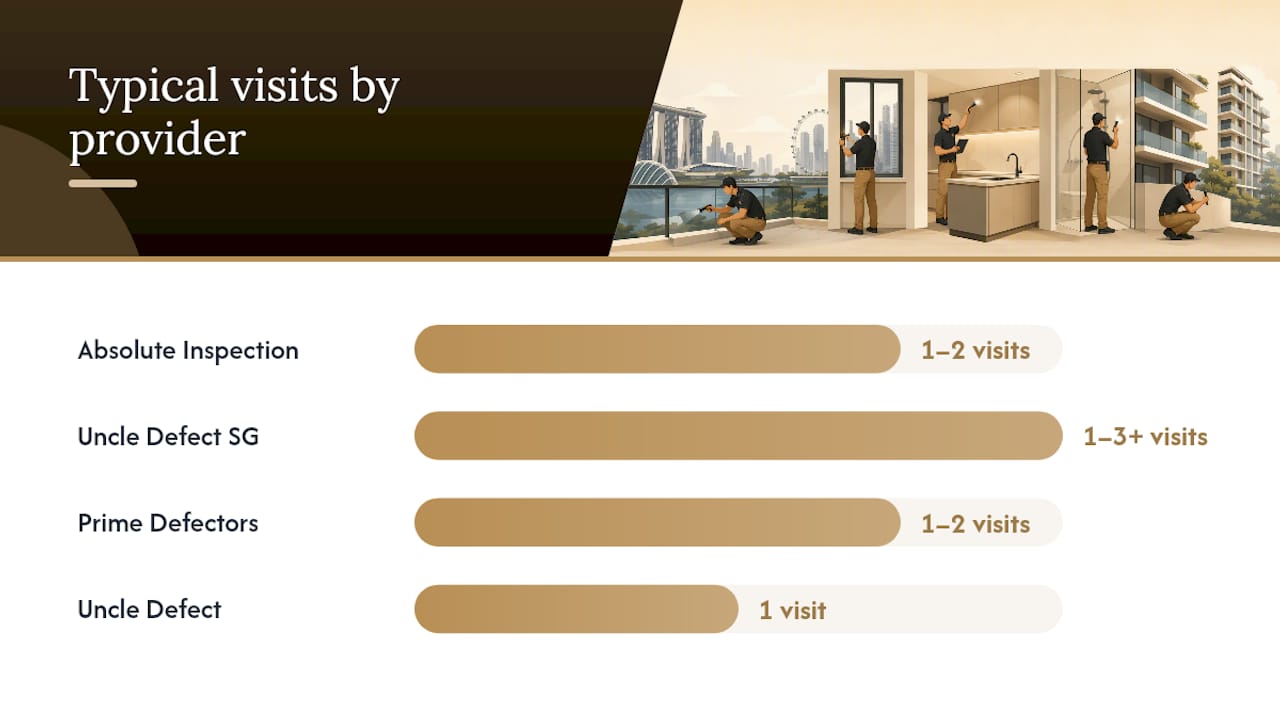
Prime Defectors positions itself around the paperwork. Its photo-rich reports are formatted for direct developer submission, and it stays in contact with the client through to repair completion rather than disappearing after the first visit.
Uncle Defect rounds out the local shortlist as a separate, name-similar provider worth checking against your shortlist before booking, since Singapore's defect-inspection market has more than one operator using close variations of the same name.
| Provider | Service focus | Typical trips included | Approx price band | Special capability |
|---|---|---|---|---|
| Absolute Inspection | Handover, technical diagnostics | 1 to 2 visits | Condo unit range, varies by size | RICS certification, thermal imaging |
| Uncle Defect SG | Handover, multi-trip packages | 1 to 3+ visits | Condo unit range, tiered by package | On-site help with developer forms |
| Prime Defectors | Handover, developer submission | 1 to 2 visits | Condo unit range, varies by size | Photo-rich developer-ready reports |
| Uncle Defect | Handover | 1 visit typical | Not published | Standard defect walk |
- Basic handover walk: any of the four will produce a usable defect list.
- Joint inspection with the developer present: Uncle Defect SG's multi-trip structure gives you a second set of eyes if the first walk gets rushed.
- Suspected hidden defects (seepage, hollow tiles under finished flooring): Absolute Inspection's diagnostic tools earn their cost here.
What Should You Ask Before Booking an Inspection?
Not every quote covers the same ground, and the gap only becomes obvious after you've paid. Before booking anyone, run through this list.
- What exactly do I get? A verbal walkthrough is worthless for a dispute. Insist on a written, photo-backed report with each defect numbered and tied to a location on your floor plan.
- What format is the report in? Ask if it is "developer-ready," meaning it matches the layout most Singapore developers expect for their defects portal submissions.
- Will you fill out the developer's defect form on-site? Some firms, including Uncle Defect SG, offer this as part of the package. Others leave it to you.
- How fast do I get the report? Same-day or next-day turnaround matters if you're racing the handover appointment.
- Are you insured or certified? RICS registration, like Absolute Inspection carries, is not mandatory in Singapore, but it strengthens your position if a dispute reaches CASE or the Strata Titles Board.
Walk away from anyone who pressures you to sign a defect acceptance form on the spot, refuses to provide photos, or gives you findings verbally with no written report.
Pro Tip: Ask for a sample report before you pay a deposit. A firm confident in its work will show you one without hesitation.
Room-by-Room Checklist for Your Handover Walk
A handover walk rewards a system, not enthusiasm. Go room by room, test the same way every time, and log everything before you leave the unit.
- Walls and ceilings. Look along the surface at an angle under natural light to catch uneven paint or filler patches. Hairline cracks under roughly 0.3mm are usually just shrinkage and not structural; anything wider or diagonal deserves a photo and a note.
- Floors and tiles. Tap each tile with a coin or a tapping rod and listen for a hollow, drum-like sound, a sign the tile isn't bonded properly. Run a spirit level across the floor near doorways and low points; a level difference of more than 3mm over 2 meters is worth flagging.
- Windows and doors. Open and close every door and window fully. Check that they swing or slide without scraping, that locks engage cleanly, and that weatherstripping seals without gaps.
- Bathrooms. Flush every toilet, run every tap, and check the floor trap drains water without pooling. Standing water more than a few millimeters deep after a few minutes of draining is a ponding issue worth reporting.
- Kitchen. Test the sink taps for both hot and cold supply, open every cabinet and drawer, and check the countertop for chips or unsealed edges near the sink.
- Balcony and AC ledge. Check the AC unit's drip tray and drainage line for leaks, and confirm the balcony floor slopes toward the drain rather than toward your living room; for DIY guidance on checking and fixing pool cages and balconies, see Pool cage repairs for home inspection: what to fix first.
- Power and switches. Use a power-point tester on every socket, flip every light switch, and confirm the DB box is labeled and none of the breakers trip under normal load.
Photograph every defect with your phone's timestamp visible, then mark the spot with masking tape and a number that matches the same number on your written list. A thorough handover checklist built around these same tap-tests and level-checks is what most inspection firms in Singapore actually run through.
What to Bring and How to Sequence a DIY Inspection
A typical 3-bedroom condo takes 2 to 4 hours to inspect properly on your own. Bring:
- A spirit level and a measuring tape
- A torch for dark corners and under cabinets
- A power-point tester (around $15)
- Masking tape and a marker for numbering defects
- A tapping rod or a coin for tile checks
- Your smartphone for timestamped photos
Turn on all utilities first, then run the air-conditioning for a few minutes while you check other rooms. Test wet areas (bathrooms, kitchen) next since they take the longest to assess properly. Finish with finishes (walls, floors, doors) and close with a final pass on the DB box and every socket.
How Do You File Defects Within the DLP?
Singapore's Defects Liability Period runs for 12 months from the date of your Notice of Vacant Possession. During this window, the developer must rectify workmanship and material defects at no cost to you.
- Submit a single consolidated, numbered list with photos and floor-plan references rather than reporting issues piecemeal.
- Use the developer's defects portal where available, or a signed physical defect list if no portal exists.
- Keep every acknowledgment the developer sends, even a simple email confirming receipt.
- If repairs stall, escalate in order: report to the Building and Construction Authority (BCA), then pursue mediation through CASE, then the Strata Titles Board for common-property disputes, and finally the Small Claims Tribunal for unresolved monetary claims.
- Each escalation body wants the same core evidence: dated photos, your signed defect list, and a paper trail of developer communications.
What Does an Inspection Typically Cost and When Should You Book?
Professional inspections in Singapore are commonly tiered by unit size and package depth, running from a basic single-trip check into the low hundreds up to over $1,000 for multi-trip or diagnostic-heavy packages.
- Book your inspection right at key collection, before any renovation work starts.
- Larger units and add-ons like thermal imaging or moisture testing push the price toward the higher end of the band.
- Most firms deliver a developer-ready written report within a few days of the visit, giving you time to submit before rectification deadlines close in.
What Happens After You Report a Defect?
Reporting a defect is the start of the process, not the end of it. Once you've submitted your numbered list through the developer's portal or in writing, the developer typically schedules a contractor visit within a few weeks, though timelines vary by building and by how many units are reporting defects simultaneously.
Confirm every rectification in person rather than taking the developer's word for it. A patched crack can look fine from a distance and still fail inspection under a spirit level or a tap test. Reopen your original numbered list, walk the same spots again, and photograph the "after" state next to the "before" photo you already have. This closes the loop and gives you a paper trail if the same defect resurfaces.
If a defect is disputed, meaning the developer claims it's tenant damage or normal wear rather than a construction fault, the burden falls on you to prove the condition existed at handover. This is exactly why a timestamped photo taken on your first walk matters more than any argument you can make later. Without it, you're relying on memory against a developer's contractor.
For unresolved disputes past the informal stage, CASE mediation offers a structured, lower-cost path before resorting to the Small Claims Tribunal. Bring your complete evidence file, not a summary. Mediators and tribunal officers work faster and rule more favorably when the paper trail is dated, numbered, and consistent from day one.
What Does the Developer's Warranty Actually Cover?
The 12-month DLP is a statutory minimum, not the ceiling on what a developer might address. It covers defects in workmanship and materials, meaning things like uneven tiling, misaligned doors, faulty fittings, and water seepage traced back to construction quality.
It does not cover normal wear and tear, damage you cause during move-in or renovation, or cosmetic issues that arise from how you use the unit rather than how it was built. A scratch on your own floor from moving furniture is your problem. A tile that was never properly bonded and comes loose on its own is the developer's.
Structural elements, such as the building's core and shell, often carry separate warranty periods that extend well beyond the 12-month DLP, though the exact terms sit in your Sale and Purchase Agreement rather than in any general guide. Read that document, not a blog post, if you need the precise boundary for your unit.
The mistake many new owners make is assuming the DLP is a formality they can address "eventually." It isn't. Once the 12 months lapse, your legal leverage to demand free rectification drops sharply, and any defect you didn't document in writing becomes much harder to prove was there at handover rather than something that happened on your watch.
Do Unresolved Defects Affect Resale Value or Insurance?
Unresolved defects follow the unit, not just the timeline. A buyer's own pre-purchase inspection, increasingly common in Singapore's resale market, will catch the same hollow tiles, water stains, and misaligned doors you'd have caught at handover. Every unresolved issue becomes a negotiating point against your asking price, or a reason a buyer walks away entirely.
Water seepage is the costliest example. An unresolved leak that was never properly rectified during the DLP can develop into staining, mold, or damage to a neighboring unit's ceiling below. That turns a simple defect into a liability dispute between owners, and insurers scrutinize water damage claims closely for evidence of a pre-existing, unaddressed condition. A documented DLP claim that was actually resolved protects you on both fronts: it's evidence for a future buyer that the issue was fixed properly, and it's evidence for an insurer that the damage isn't a preexisting condition you sat on.
This is one more reason a written, photo-backed report is worth more than a mental note. Years later, when you're selling or filing a claim, that report is the only proof you have that the defect existed, was reported, and was closed out.
Which Defects Should You Flag as Urgent?
Not every defect deserves the same urgency. Prioritize anything touching water, electricity, or structural elements first: active leaks, exposed wiring, sockets that fail a tester, or any crack wider than the hairline threshold. These can worsen quickly and are exactly the categories that get harder (and costlier) to prove once you've moved in and started living with the damage.
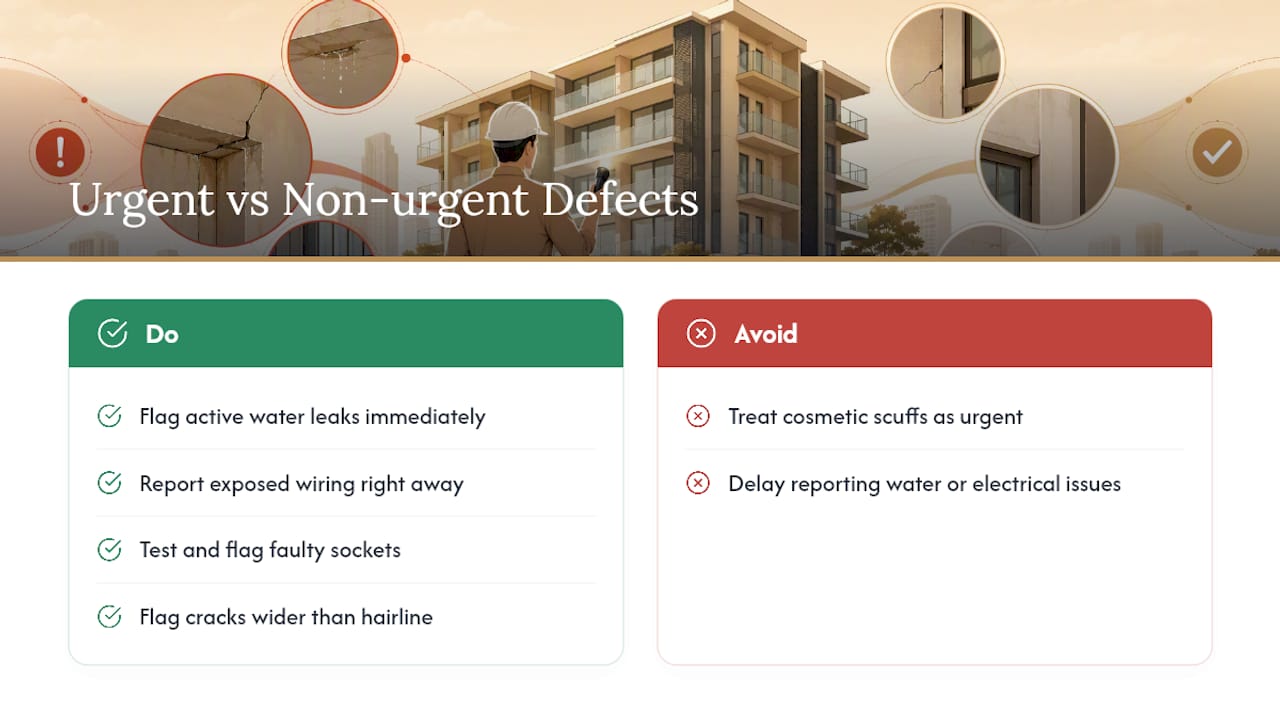
Cosmetic issues, uneven paint, minor scuff marks, small gaps in trim, still belong on your list, but they won't get worse if the developer takes a few extra weeks to address them. Sequence your own follow-up calls accordingly: chase the water and electrical items hard, and let the cosmetic backlog work through the developer's normal queue.
An Editor's Note on Documentation
Mark, photograph, submit, then reconfirm after rectification. One buyer's leak claim held up in mediation for one reason: a timestamped photo from move-in day, taken before anyone could claim the damage happened later.
— Simon
Buyer Resources From Hougang Central Residences
Hougang Central Residences publishes its own handover guidance for new owners, built specifically for the kind of unit you'll actually be inspecting here, not a generic template. Our condo renovation rules and DLP timing guide walks through exactly when you can start renovation work without jeopardizing your defect claims, and our smart-home features checklist covers what to test on the in-unit panel before you sign off, since a smart-home defect is easy to miss on a standard walk.

These resources sit alongside the development itself: 835 units directly above Hougang MRT, from 1-bedroom plus study layouts to 5-bedroom penthouses, each fitted with premium European fixtures and a smart-home system as standard. If you're still comparing layouts, browse the full range of residences before you commit. Pricing starts from $2,800 per square foot, and our buyer support team can walk you through handover expectations well before you ever pick up a spirit level. Visit the pricing page to check current availability and get a quote for your unit type.
Sources
- Renonation – Defect checking tools every homeowner should know
- LovelyHomes – Singapore condo handover defects checklist 2026
- Uncle Defect SG – BTO & Condo Defect Inspection Singapore
FAQ
How Do I Check for Defects in a New Condo?
Walk every room with a spirit level, a torch, and a power-point tester, checking floors, tiles, doors, windows, and wet areas systematically. Photograph each defect with a timestamp and log it against a numbered floor plan, following the same room-by-room method professional inspectors use.
How Much Does a Singapore Defect Inspection Cost?
Professional inspections in Singapore are commonly priced by package tier and unit size, from a basic single-trip check up to over $1,000 for multi-trip or diagnostic-heavy packages. Larger units and add-ons like thermal imaging push the cost toward the higher end.
Where Can I Find Defect Inspection Services in Singapore?
Reputable options include Absolute Inspection for RICS-certified technical diagnostics, Uncle Defect SG for tiered multi-trip packages, and Prime Defectors for developer-ready photo reports. Hougang Central Residences also publishes its own handover guidance to help new owners prepare before booking any inspection.
How Long Do I Have to Report Defects After Handover?
Singapore's Defects Liability Period runs for 12 months from your Notice of Vacant Possession. Report every defect in writing well before this window closes, since your leverage to demand free rectification drops sharply once it lapses.
Should I Hire a Professional or Inspect My Condo Myself?
DIY inspection works well for most standard handovers if you have 2 to 4 hours and a basic toolkit. Hire a professional if you suspect hidden issues like water seepage, want thermal or moisture diagnostics, or need a report formatted for a future dispute.